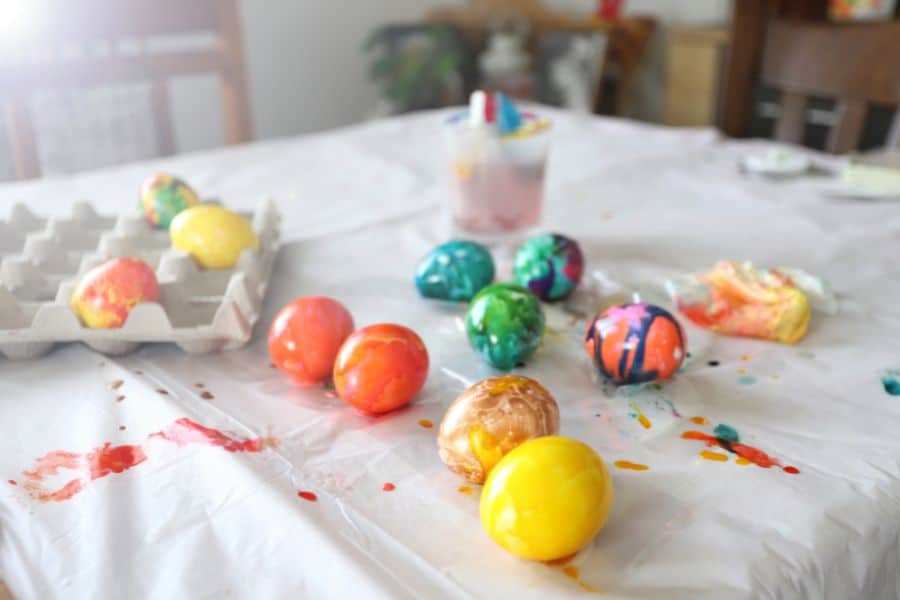
If there’s an Easter tradition that never grows old, it has to be egg dyeing. I mean, there’s something about this age-old craft that neither of us is willing to let go of any time soon.
After all, who doesn’t find transforming “boring” plain eggs into beautiful works of art satisfying? I guess we all do, and in fact, that’s most likely the reason we’re all here in the first place.
In today’s coverage, we’ll examine some clever and delightful ways to add enchantment to your eggs come Easter – or any other special moment. Each of our methods is simple, so you don’t need to be a seasoned artisan to produce some mesmerizing results.
Let’s dive right in!
3 Eggcellent Ways to Dye Your Easter Eggs
We don’t have a single way to dye eggs. Not even two, three, five, or even ten ways. There are lots and lots of techniques you can use to make your plain eggs look crafty and mesmerizing.
But for today, we’ll only stick to three methods that we found simple yet very promising in terms of fun and the final outcome.
Method 1: Using Nail Polish
The first egg dyeing technique involves using one of the things you probably weren’t expecting. But trust me; it’s one of the egg-painting ways that when done correctly will give you a stunning outcome.
For this method, you will need to gather the following:
- Different colors of nail polish
- A plastic container
- Water
- Toothpick
- Hard-boiled eggs
As for the nail polish, you can use as many different colors as you want. But we recommend that you work with at least 10 varieties so you can get a unique appearance for each of the eggs.
On the eggs, it’s essential to ensure that they’re genuinely hard-cooked. How long you need to boil them will depend on the size of the egg, but you can take a quick look at this article for some expert tips on how to perfectly hard-cook eggs for dyeing.
Procedure:
Once you’ve gathered all the necessary items, follow these steps to give your eggs a unique look.
- Fill Your Plastic Container With Water: It’s the initial dyeing step. One thing you have to ensure here is that the water is at room temperature before you move to the next step. That will ensure that it mixes up perfectly with the nail polish without sinking to the bottom. To ensure ambient water temperature, pour water into the container five hours prior – or even earlier – and keep it in the same room where you intend to do the dyeing. You can put it in the morning if you intend to do the dyeing in the afternoon or evening.
- Drip in the Nail Polish: Once the water is at room temperature, the next step is to add nail polish to it. Do it gently, drop after drop, so again it doesn’t sink to the bottom. You will also want to ensure that you don’t do the dripping all in one place. Instead, keep moving the polish above the water’s surface to make it easy to spread across the water.
- Move to Other Colors: Once you’re done applying the first nail polish color, move to the second one. Use a similar technique to mix it with the water. Once done, move to the third, fourth, and so on and so forth until you have all the nail polishes added.
- Stir the Colors: Once you have all the nail polishes added, it’s time to stir up the colors. Do it gently using a toothpick. If the container is too large for the toothpick, get something larger that will do the job perfectly.
- Do the Dipping: This is where all the magic comes in. Holding your first egg by the end, submerge it into the colored water and slowly lift it up. You may want to rotate it gently as you raise it up so you have more area covered by the dye.
- Dry the Eggs: After removing the first egg from the mixture, place it on a dry surface for them to dry. An egg tray would be a perfect option, but ensure that you keep the eggs sideways instead of the usual upright placement.
Move on to dip the other eggs and place them on the tray following the exact steps you used for the first and leave them to dry — and that’s it.
Method 2: Using Melted Wax
The second method is less work than the first and won’t take as much time. But as usual, you’ll need to first get all the essentials for the job.
In this case, you will need:
- Wax
- Hard-boiled eggs
- Dye
- Container
- Toothpick
Procedure:
Follow this simple procedure to get your eggs colored;
- Coat the Eggs: Using waxy crayon or melted wax, draw your preferred designs on the hard-boiled eggs. You can use a toothpick for the work, and try to create a unique design for each egg unless you want all your eggs to have the same color. Then, leave them to dry.
- Submerge the Eggs: Place the eggs into the food color, ensuring they’re fully covered. Leave them submerged for a few minutes before removing them and allowing them to dry.
- Scrape off Wax: Once the dye has dried, it’s time to remove the wax. Scraping off the wax will create patches that will complete the decoration. You can then refrigerate the eggs until when needed.
Unlike the previous method, the colored eggs, in this case, are edible. That’s because the technique uses edible food color – as opposed to nail polish or any other toxic substance – to work the magic.
Method 3: Using Vinegar
The third method of creating colored eggs is by making vinegar part of the equation. Similar to the second technique, this method doesn’t require much time, although you may still need a bit of patience.
Here’s what you need to do the dyeing:
- Food color
- White/ Apple cider vinegar
- Hard-boiled eggs
- Hot water
- Tongs
- Jars
Get as many food colors as the number of tones you want for your eggs. The number of jars will also depend on the variety of colors you have. Usually, each glass should hold a different color of solution.
Procedure:
Here’s a 5-step guide on how to go about it:
- Mix Vinegar and Food Color: Mix 15 drops of the first food color and 1 teaspoon of vinegar in one of the jars. Repeat the step on other jars, but ensure that you use a different food color for each but stick to the same quantity of vinegar.
- Add Water: Pour 1.5 cups of hot water into the first jar, and submerge your first hard-boiled egg into it using tongs. Be careful when dipping the egg to avoid burns from splashes that may come from sudden dropping.
- Repeat the Process: Repeat the second step for each of the jars until all the eggs are submerged.
- Allow to Sit: You’ll need to leave the eggs inside the jars for 30-60 minutes. Usually, the longer you leave the eggs in the solution, the more colored they get.
- Remove: Once the waiting is over, you can now remove the eggs and store them in a dry place for them to dry out – and that’s it!
If you don’t want to use real eggs for this painting project, you can always opt for plastic craft eggs. They perfectly mimic the actual eggs, and they’ll even save you from the hassle of having to hard-boil them before painting.